
Going for Baroque (A DIY Bedroom Makeover)
- Monica Montanari
- May 20, 2024
- 6 min read
I can't even tell you how many projects I've started, that have posts written up about them, and are just sitting there waiting because there's one thing missing. I'm determined to stop doing projects and let them sit at 95%. So when I began the process of redoing my room, I decided that it was getting completely finished within a few months. Surprisingly, I succeeded.
Doing design for other people is so much easier. I have a vision, I get an easy 'yes' or 'no', it's done. When it comes to your own place, it's so much more complicated. I'm going to have to look at everything I put in here every single day for who even knows how long- and an artist is always their own worst critic- so I was determined to make my room elegant while keeping it functional. So many people design gorgeous spaces that have nowhere to put stuff. Hello, I actually live in this room. It needs a place for stuff like scissors, random sentimental souvenirs from my entire childhood, printer paper, you get the gist.
Read on for all the details or just skip to the end to see the final result.
The Theme:
Originally, I based the theme around these two bookshelves I have that I love- they are reminiscent of ladder shelves but with wood shelves and black industrial pipe frames. I thought I'd do an industrial, modern, rustic French provincial theme to compliment them:


As the room came together, the design morphed into a more modern, clean, French provincial.

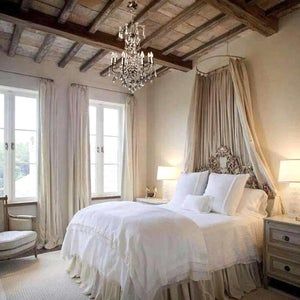
I love the look of French style. I immediately think of Versailles, which is one of my favorite places in the world. But sometimes the rich colors and vibrant gold details of nobility can be overwhelming when they cover every piece of furniture and the walls.

I wanted to channel those ornate, rococo details while maintaining a modern, clean look that wouldn't scream "tacky". It probably still does. Too bad. I like it. You'll see it all come together below.
Headboard
This was truly the first piece that came to life. I searched everywhere for the right headboard that would make the statement I was hoping to make in the design. There were a few things I hadn't thought about with headboards before; namely, that a fabric headboard would probably get dirty from literally anything touching it. So I decided to go with something wooden that would be cleanable and chic.
I quickly came to realize that I was going to have to do some DIY with anything I did, so I found the right piece, invested in a $30 paint sprayer from Amazon, and bought the black version of my favorite furniture paint.
I wish I could remember how much it was but I know it was between $100-200 for the headboard, $9.99 for the paint, $30 for the sprayer, and viola- we went from:

Now don't get me wrong, I thought it was beautiful before, but something about making it a sleek uniform black made it stunning in my opinion. Not to mention, pieces like this go for over $1,000 on Etsy (not including shipping). So clearly I must have good taste. If not good, definitely expensive.
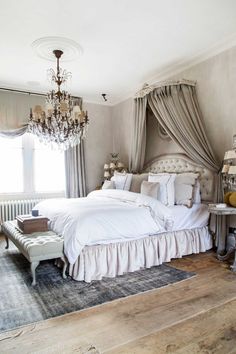
Bed Crown
Speaking of expensive taste, did you know that buying a bed crown will set you back roughly $200? But one simply does not do a French bedroom without a bed crown. At least I don't. That would be a travesty.


I searched far and near and ended up finding a "shelf" that was absolutely perfect. All it required was, you guessed it, a complete makeover. Fml. But honestly I used spray-paint for this and it was done within 30 minutes. Simple. Add some hanging mechanisms (i.e. copper pipe around the interior) and a few yards of sheer white fabric, and you've got yourself a bed crown fit for a queen (pun intended).

Bedspread
I went through at least 5 different options before settling on this duvet cover from Pottery Barn:

It's far more feminine than I usually go for, but it was truly the only thing that I could find that I felt would work with this complicated theme. I eventually balanced out the femininity of it by creating a juxtaposition between the roses and some framed artwork on either side of the bed, which you'll see at the end. I decorated it with the matching pillows and some patterned shams from Amazon, and it came together nicely. Check out the photos at the bottom to see the final result.
Nightstands
Although I did LOVE the antique wash on the original tables, I knew that if I wanted the space to be cohesive, I was going to have to cave and have some matching pieces. So I decided that by painting the tables and the desk the same color, I would be able to tie everything together beautifully. A paint sprayer, white furniture paint, and some black metal-adhering spray-paint were all it took to bring these gorgeous tables from the 18th century into the modern day.

Lamps
Did I say I have expensive taste? I completely fell in love with the look of these lamps.

Only problem? They all cost at least $400 a piece. Some lamps like this go for up to $1,400. No thank you. Utilizing my recent manufacturing connections from my cosmetics company, I got in touch with a manufacturer who makes these. For the same price as one of these lamps somewhere here, I had two custom made with not glass, but Austrian crystal accents and shipped right to me. I wanted mine quite a bit bigger also, and I'd guess that each lamp weighs at least 35 pounds. I'm not kidding.

Desk
This was a toughie. I looked everywhere for the right desk. I had to learn what search terms to use to even start to look. Turns out what I wanted might be known to some as a "storage desk". Apparently any desk with more than, like, two drawers is a "storage desk". Fine. I sifted through hundreds of listings on OfferUp and Facebook Marketplace, as well as trying to find brand new options, but I was determined to spend less than $200 because technically I already had a desk that would work but it wasn't anything like what I wanted. After weeks, maybe months, of searching, I came across this perfect beauty for $100 on Facebook and snatched it up.
I must say, I loved this desk so much that I didn't want to paint it. I thought the wood was beautiful. But, alas, it wasn't going to work in that color and I wanted it to look clean, sleek, and chic. So I got out my paint sprayer and furniture paint and got to it:

There was just no way I had the energy or desire to paint inside the drawers- the front of each drawer was enough of a pain. So to cover up the overspray that went into the drawers themselves, we used some adorable white shelf liner with a baroque motif from Walmart. They look so much better it's not even funny. Highly recommend.
Using black spray paint, I did the hardware to match the hardware on my nightstands, and the contrast turned out absolutely beautiful.
Curtains & A Mini Gallery Wall
I loathe shutters. I really do. Sure, they're a good idea, but in my opinion curtains are so much more elegant, allow you to see out the window clearly, and make it so the light can really enter a room. Plus, with blackout curtains being a thing, and curtains being less than half the cost of shutters, I honestly don't know why shutters exist. I digress. When I sleep, I love absolute darkness. I'm serious. I cover up every little charging and power light, and shutters alone just don't do the trick. So I decided that although I hadn't heard of it before, I was going to do curtains on top of the existing shutters.
Thank goodness I have Pinterest to let me know that I'm not the only idiot who has ever done this. Honestly, this time, it wasn't even inspiration. It was just reassurance:

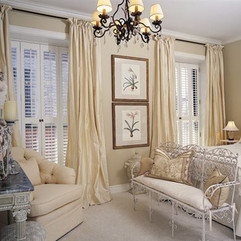


In between the two windows, there was a definite need for something. So after trying and returning a number of options, I settled on three square picture frames that matched the black of the metal accents in the room and had bright white matting to tie them in with the furniture. The idea was to channel this kind of simple elegance:

And I think I did just that (as you'll see in the gallery below). I also went through four or five different Amazon blackout curtain options before I found them in a pale pink color that I could work with. It was so time consuming and such a mess. Slide through to see the whole struggle (ft. an overwhelming MESS and my adorable sidekick).


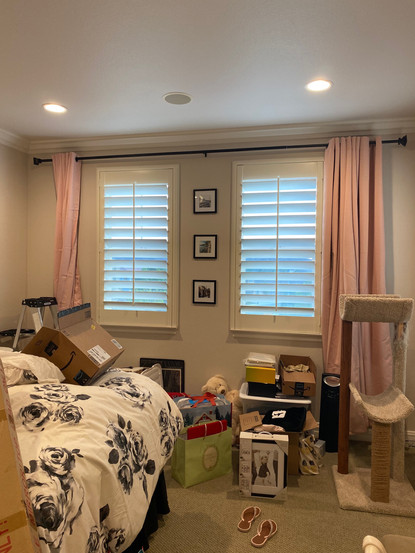


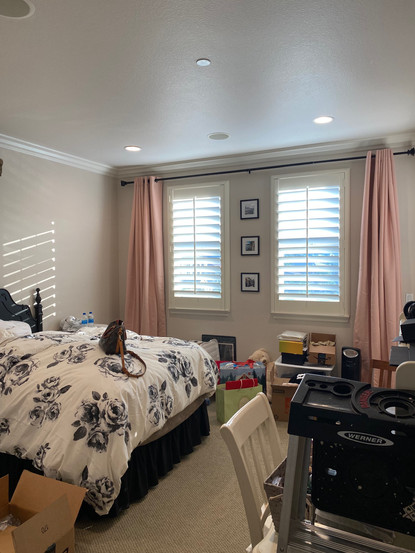


I'm sure I bored everyone around me by sending them new pictures every day and asking "left or right". Sorry, people, but look how it turned out!
Overall
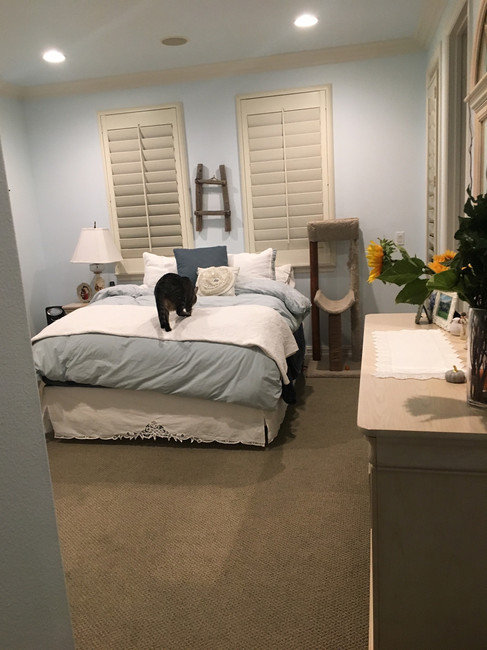
I'd say it was a massive success. It was cheap, easy, and quick. Everything I wanted and more. Now I have a space that went from Tommy Bahama to Tommy Hilfiger. Just for reference here are a few "befores" of (1) my décor in my previous room and (2) the décor in this room previously:


And now, the moment we've all been waiting for. The final result. Slide on through to get every stunning detail:


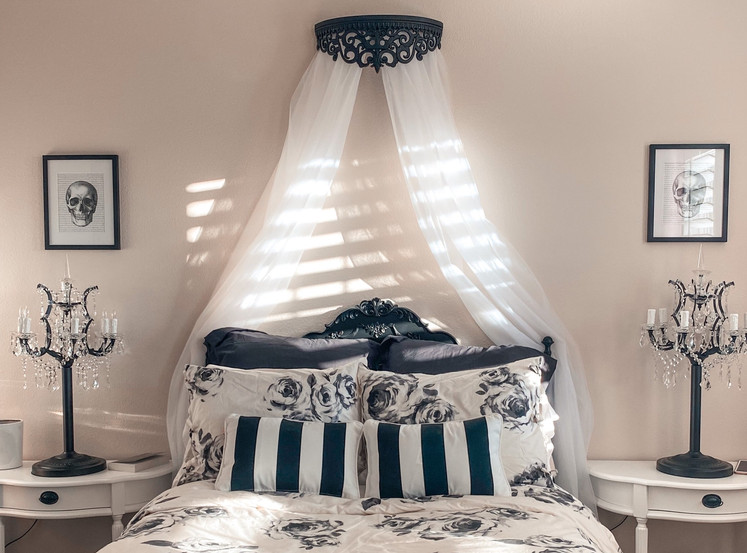
As always, if you want more details on how I did something, links to where to get things, or just have questions, feel free to comment. Thanks for reading!

You did not answer me - Please do that for me-IT would be something to see M-M out there with a picture of her with the Perfume.